
Artwork © Christopher Martin
DRAWING
MR. MARTIN, 2022-23
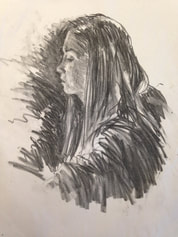 Charcoal, Chris Martin
Drawing is a foundation course recommended for all students interested in art. Students will investigate a variety of drawing techniques and materials using both observation and imagination. Students will practice artistic behaviors in combination with studies of Elements and Principles of Design, art history and aesthetics to broaden a sense of the context in which artists work. This course is a prerequisite for Painting and 3-D Design, and may be used as the prerequisite for Ceramics I. There is no prerequisite for this course. This course satisfies the ½ credit art graduation requirement.
WEEK ONE:
Course overview AND drawing in line
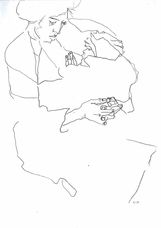 Contour Line Drawing by Egon Schiele
In week one, students will become familiar with course objectives, classroom facilities and teacher expectations.
We will begin the study the line and investigate its power to create imagery. Students will begin to work in different styles of line including CONTOUR LINE and CONTINUOUS CONTOUR LINE.
Contour Line Drawing is a type of drawing in which all visible edges are recorded; this includes physical edges as well as edges created by shadows, highlights, color changes, etc.
.
ASSIGNMENT RESOURCES
Here's a video I made demonstrating the technique of contour line drawing.
Would be much better with a split screen, but c'est la vie.
Would be much better with a split screen, but c'est la vie.
WEEKS TWO AND THREE:
Using line to create dynamic drawings
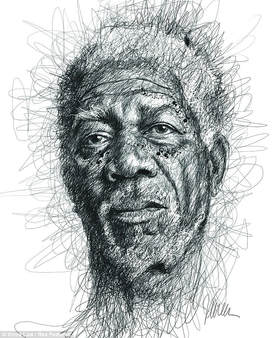 "Morgan Freeman" scribble drawing by artist Vince Low
Line has a lot of power. It can create a likeness, lead the viewer's attention, and define a space. This week, we will learn and practice line techniques to create a sense of mass. We will complete our study of Contour Line drawing, introduce Scribble Line drawing, and finish the week with Cross-Contour drawing.
Scribble Line drawing is a method of drawing where line is used in every way EXCEPT as an outline. Scribble lines can be used to create a modeled (shaded to look three-dimensional) effect and to give an impression of movement and texture. The drawings capture a sense of frantic energy and are both exciting to create and exciting to view. To be successful at Scribble Line Drawing, the artist must divorce himself from the idea of outline and use line to fill space with VALUE (lightness or darkness). Lighter areas are created by going over the paper only a few times or not at all. Darker value areas are accomplished by going over them with line again and again.
Scribble Line drawing is a method of drawing where line is used in every way EXCEPT as an outline. Scribble lines can be used to create a modeled (shaded to look three-dimensional) effect and to give an impression of movement and texture. The drawings capture a sense of frantic energy and are both exciting to create and exciting to view. To be successful at Scribble Line Drawing, the artist must divorce himself from the idea of outline and use line to fill space with VALUE (lightness or darkness). Lighter areas are created by going over the paper only a few times or not at all. Darker value areas are accomplished by going over them with line again and again.
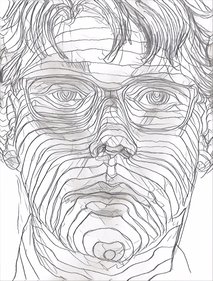 Cross-contour drawing by Chris Martin
Cross-Contour drawing is a line-drawing technique that artists use to understand the three-dimensions and mass of an object. A good beginning step to understanding Cross-Contour is to think of it as a drawing that shows the three-dimensional features of an object in a way similar to the way a topographical map shows the features of the land. The curves of what appear to be parallel lines give us cues to the up-and-down undulations of the three-dimensional surface of the subject.
ASSIGNMENT RESOURCES
Here's artist Vince Low creating one of his celebrity scribble drawings.
Great video lesson by Phil Davies of arttutor.com on how to understand and make cross-contour line drawings.
WEEK fOUR:
What is VALUE and how do we use it?
 Image from Monica White's Art Blog
This week we will begin our investigation of VALUE, an exciting design element. VALUE refers to something's relative brightness or darkness and it is through bringing value into our work that we can create a sense of mass and three-dimensions. Also, the mystery of the Number 2 pencil will be revealed!
ASSIGNMENT RESOURCES
|
Here's a clear, easy breakdown on the method of drawing a 9-step value scale from thedrawingsource.com. It takes all of the mystery out of getting the right grays.
|
Here is a Powerpoint review of the major topics we've covered regarding LINE DRAWING and a discussion
of our new topic, VALUE. |
|
SHADING LESSONS- Artist Leonardo Pereznieto gives a great lesson on turning flat line drawings into drawings that suggest 3-D forms.
PLUS he has a really cool Italian accent. |
And how do I describe this?
Well, let's just say that I love pencils. A lot. Here's an entire page devoted to that with some great links to pencil stuff. |
WEEK FOUR (cont'd):
Using VALUE to create the illusion of mass and three dimensions
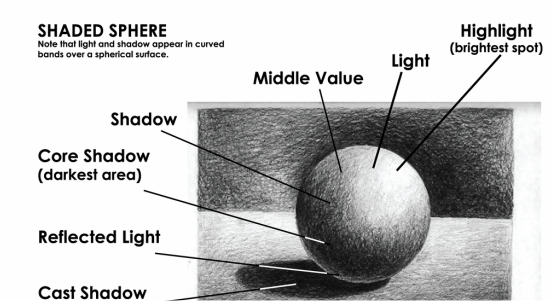
Illustration from drawingwithhohman.blogspot.com, labels added by C. Martin
And we continue with our study of VALUE! Drawing in value to create a sense of a subject's mass is one of the artist's great challenges. It requires good pencil control, a knowledge of pencils and other artist's tools, an understanding of how light plays over a three-dimensional surface, and excellent observation. This week, we will study and practice the knowledge and skills necessary to have success in value drawing to create the three dimensional illusion. We will draw all sorts of forms, but the sphere is the hardest, so our web resources will focus on that. Click on the button below for the Shaded Sphere handout.
ALSO, Suggested review: Artist Leonardo Pereznieto gives a great lesson in value drawing
ALSO, Suggested review: Artist Leonardo Pereznieto gives a great lesson in value drawing
ASSIGNMENT RESOURCES
|
Here is a handout of the above illustration the demonstrates the shadows and highlights as they appear with a single light source as well as provides key vocabulary for the final exam.
|
Here is an excellent YouTube video by Wei Ho, a film and videogame concept artist. His website, The Art of Wei, is an excellent resource for drawing tips and lessons.
|
Here's a great resource for learning how to create believable cast shadows from artist Bill Martin's (no relation) Guide To Drawing.
WEEK FIVE:
what is proportion and how is it used?
and.... Perspective- The Hallway Drawing
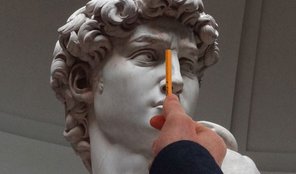
Photo from drawingacademy.com
|
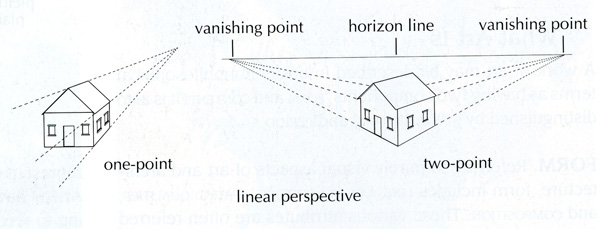
Image from artistdaily.com
|
Simply put, PROPORTION is the size of one thing compared to the size of another. Being able to convey accurate proportions in your life drawings will make them seem much more realistic. Manipulating proportions to achieve effect will make your imaginative drawings more interesting. This week we will learn various techniques to check and measure proportions as we draw.
AND...
we will learn about and use LINEAR PERSPECTIVE, a system of drawing that uses lines and points to create a consistent, believable 3-D illusion. In class, we will study both 1-point perspective and 2-point perspective. We will pursue our study with several practice drawings and culminate with a week-long drawing in 1-point perspective of the hallway outside the art room. This drawing is worth 100 project points.
ASSIGNMENT RESOURCES
|
Here's one of my diagrams on how to use the pencil as a measuring tool. This one shows what it should look like when you are looking down your arm to the pencil and the subject.
Here's the other of my diagrams on how to use the pencil as a measuring tool. This one showing an overhead view how you should hold the pencil relative to your body.
|
Click above for a PDF of a short ebook I put together introducing the concept of LINEAR PERSPECTIVE
Click above for a video on how to set up your drawing board before you begin your LINEAR PERSPECTIVE drawing.
|
Here's a YouTube video in which I demonstrate the technique of measuring for proportional accuracy.
WEEK SIX:
Drawing the Human Figure
 Image by kirilee.deviantart.com. Used with permission.
A FIGURE DRAWING is a drawing of the human body. The human form is one of the great themes in the visual arts. We will learn how to apply all of our techniques learned to date to capture the dynamism (changing nature) of the human body through our drawings.
During the FIGURE DRAWING unit, we will use CHARCOAL for many of the drawings. CHARCOAL is a natural artist's material that is created by the slow combustion of wood. It is a very loose medium (artist's material) that allows for smudging, blending, and expressive lines.
We will begin with GESTURE DRAWING, a way of drawing used to quickly capture the sense of a subject's living pose. We will also make use of our prior studies in proportion measurement and value by applying them to drawing the human form. All of these ideas will come into play as we begin our all too brief study of drawing the human figure.
Special thanks has to be given to our friend Kirilee from kirilee.deviantart.com who allowed me to use part of her great series of "Drawing Reference" photos in this lesson. If you click on the "8 Figure Drawing Tips" presentation below, it will also take you to a gallery of 10 poses by Kirilee. If you visit her site and search "Drawing Reference" in her gallery, you can see MANY more poses in this set.
ASSIGNMENT RESOURCES
WEEKS SEVEN and EIGHT:
Synthesis Project- The Narrative
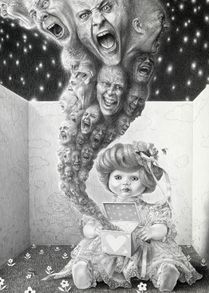 "Pandora's Box" by artist Laurie Lipton
Artwork is said to be NARRATIVE when it incorporates elements that tell or suggest some sort of story. In this project, you will attempt to bring narrative qualities into your work while utilizing nearly all of the techniques we've studied to date. While developing your idea, we will study some works by the Surrealists, an early-to-mid 20th Century movement in art, writing, and music that examined the unconscious mind. Surrealistic artwork is extremely narrative, but not in a conventional way!
WHAT YOU WILL CREATE/TURN IN:
-Write one sentence as the "kick off" for your narrative. Create a situation that can be illustrated through your art, something that inspires an image in your head. It can be subtle or over-the-top. It's up to you. (10 points)
-Develop your idea in a large pencil sketch. Use the Rule of Thirds; foreground, middle ground, and background; use overlap and other compositional techniques you know that will convey a believable environment in your work. (25 points)
-The final project is a fully developed black and white charcoal drawing on toned paper that is based on your large pencil sketch. We will create the toned paper using washes of watered-down acrylic paint on watercolor paper (100 points)
-A written wrap-up critique that details what you did in the drawing, how you did it, and why you did it as well as a critique of your finished product that discusses the specifics of what you believe you did well and what you could improve. (15 points)
TOTAL ASSIGNMENT POINTS: 150
IN THE FINAL DRAWING, YOU MUST INCLUDE:
A) at least one human figure drawn realistically (either from life OR from a photo you've personally taken),
B) at least five box forms drawn to demonstrate both one and two-point perspective,
C) at least one Surrealistic element (see the button below),
D) a composition devised using the Rule of Thirds (other compositional techniques may be used as well)
Assignment Resources
Click above for a quick, well-explained tip on how to compose, or set up your drawing.
